Drone CI: A Quest to Implement Open Source Cloud Native CI/CD Tools on Kubernetes (Part 1)
By 8grams Tech
Drone CI is a Continuous Integration system built with simplicity and effectiveness in mind. It's an open-source platform that orchestrates your build workflows, automating the testing and integration of code changes.
Introduction
Drone CI, standing for Continuous Integration, is a self-service Continuous Integration platform built on container technology. With an increasing need for continuous integration and continuous delivery (CI/CD) in modern software development to ensure code changes are consistently tested and ready for deployment, solutions like Drone CI have become integral. The essence of Drone CI lies in its simplicity, allowing for seamless integration into various development workflows. Its lightweight nature and ease of setup have contributed to its growing popularity among developers and organizations aiming to adopt a robust CI/CD platform without a steep learning curve. This article aims to delve into the heart of Drone CI, exploring its architecture, deployment on Kubernetes, and a comparative analysis with other CI tools like Jenkins and Tekton.
What is Drone CI?
Definition and background of Drone CI
Drone CI is a Continuous Integration system built with simplicity and effectiveness in mind. It's an open-source platform that orchestrates your build workflows, automating the testing and integration of code changes. One of the defining features of Drone CI is its container-native nature, which means every build process runs in an isolated container. This ensures a consistent build environment, making the builds reproducible while also providing a secure boundary around each build process.
Imagine a scenario where a development team is working on a web application. Each time a developer pushes changes to the version control system, Drone CI automatically triggers a build process within a container, running specified test suites to ensure the changes do not introduce bugs or break existing functionality.
Highlighting key features of Drone CI
Drone CI comes packed with features designed to streamline the CI/CD process. Some of these key features include:
- Pipeline as Code: Drone CI adopts a pipeline as code approach, allowing developers to define build pipelines through files within their repositories. This not only version-controls the pipelines but also fosters a collaborative approach to managing build processes.
- Container-Native: As mentioned earlier, being container-native allows Drone CI to run each build process in isolated environments, ensuring consistency and security.
- Plugin System: Drone CI has a rich plugin system that extends its functionality. There are plugins for various tasks such as notifying Slack channels of build status, publishing Docker images, deploying to cloud platforms, and many more.
- Multi-platform Support: Drone CI supports multiple platforms including Linux, Windows, and ARM, thus catering to a wide range of infrastructural needs.
- Integration with Version Control Systems (VCS): Drone CI integrates seamlessly with popular version control systems like GitHub, GitLab, and Bitbucket, automating the build process from code push to deploying updates. For example, In a GitHub integrated setup, a
pushorpull requestevent in the repository can trigger the Drone CI pipeline, automating the testing and integration process, and providing feedback directly on the GitHub interface regarding the build status.
These features collectively contribute to the robustness and versatility of Drone CI, making it a go-to choice for many development teams and organizations aiming to streamline their CI/CD processes.
Architecture of Drone CI
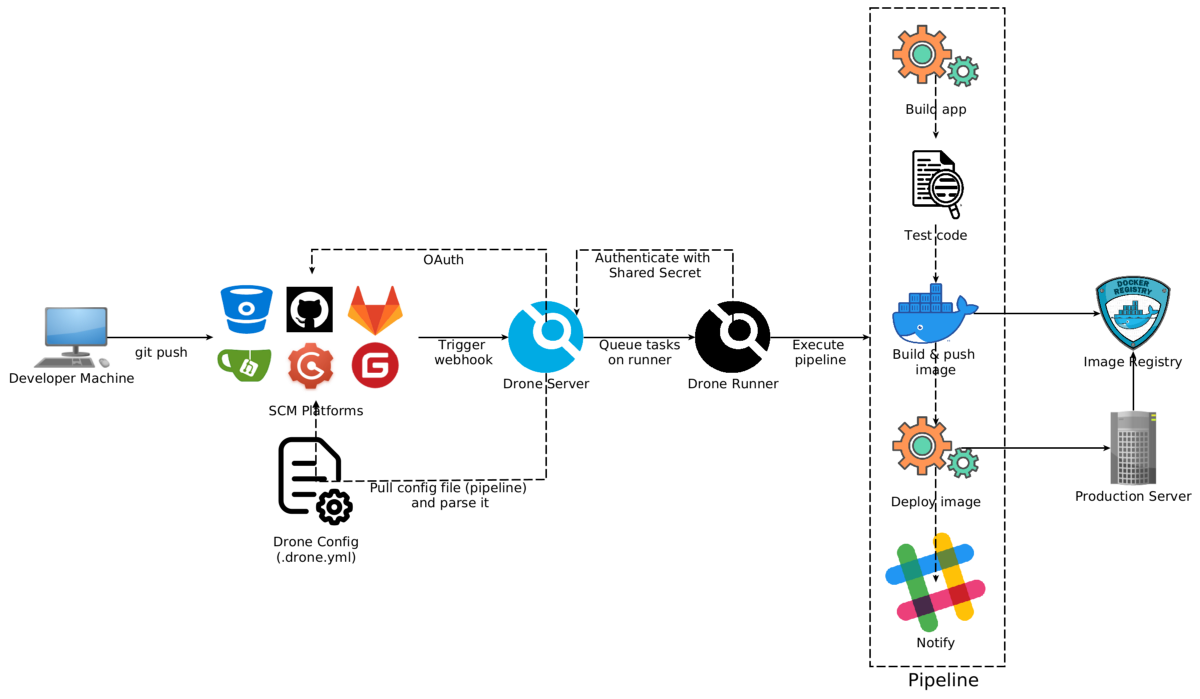
Drone CI is built on a simplistic yet robust architecture that aims to streamline the Continuous Integration (CI) process. The core components of its architecture include the Drone Server, the Drone Agent, and a distributed queue for handling build pipelines. Here's a closer look at these components:
Drone Server
- The heart of Drone CI, the Drone Server, manages the orchestration of build pipelines, handling webhooks from version control systems (VCS), and coordinating the build processes.
- It also provides a user interface for developers to view the status of their build pipelines, manage project settings, and review build logs to diagnose any issues.
In a typical setup, a developer pushes code to a repository, triggering a webhook to the Drone Server. The server then orchestrates the necessary build pipeline, providing real-time feedback to the developer through its user interface.
Drone Agents
- Drone Agents are responsible for executing the build pipelines as orchestrated by the Drone Server.
- They run in isolated containers, ensuring a consistent and secure environment for each build process.
In a scenario with multiple concurrent build processes, Drone Agents ensure each process is executed in its container, maintaining the isolation and consistency necessary for accurate testing and integration.
Distributed Queue
- The distributed queue is a key component that helps manage the load of build processes, ensuring efficient distribution of tasks to available Drone Agents.
- It plays a crucial role in scaling the CI/CD process, especially in environments with a high volume of build tasks.
Drone CI vs Jenkins vs and Tekton
A cloud-native company heavily invested in Kubernetes might find Tekton to be a natural fit, while a smaller startup with simpler requirements might opt for Drone CI for its straightforward setup and operation.
| Criteria | Drone CI | Jenkins | Tekton |
|---|---|---|---|
| Ease of Use | Simple, straightforward setup. | Steep learning curve, highly flexible. | Requires Kubernetes expertise. |
| Scalability | Naturally scalable with container-native architecture. | Scalable with additional plugins and configurations. | Designed for scalability in Kubernetes environments. |
| Extensibility | Rich plugin system. | Vast repository of plugins. | Extensible through custom tasks and Kubernetes integrations. |
| Community Support | Growing community. | Mature, extensive community. | Emerging, growing within Kubernetes community. |
| Ecosystem | Good range of plugins and integrations. | Vast variety of plugins and integrations. | Growing, leverages Kubernetes ecosystem. |
| Ideal Project Size | Small to medium-sized projects. | Large, complex projects. | Projects heavily invested in Kubernetes and cloud-native practices. |
| Infrastructure Suitability | Well-suited for containerized environments, especially Kubernetes. | Versatile for various infrastructures with additional setup. | Best suited for Kubernetes-centric infrastructures. |
Install Drone CI on Kubernetes
We will install DroneCI on Kubernetes and utilize it to build a Docker image from a repository on GitHub.
Preparation
DroneCI can be natively installed on Kubernetes using the Helm Chart Template provided by 8grams. To install it, ensure that Helm is installed on your machine, then clone the Helm Chart Template:
~$ git clone [email protected]:8grams/microk8s-helm-chart.git charts/generalInstall Server and Runner
We will install two components of Drone CI: the Server and the Runner. For the Runner, we will use the Kubernetes Executor, which means each build step will be executed by a container running in a Pod. This model is not only conducive to ensuring a clean, controlled environment for each step, but also aligns well with the principles of containerization, where each process is isolated along with its dependencies.
For your information, at the time of writing this article, the Kubernetes Executor on Drone CI is in Beta state and has not yet reached General Availability. However, we have already assessed it and used it in production, and we believe it's quite stable and worth trying.
For Server installation, create a file values-server.yaml to override Helm Chart Template values.
And for Runner installation, create a file values-runner.yaml
Note: Please adjust the values in values-server.yaml and values-runner.yaml to fit your needs. You may want to update these values accordingly.
On values-server.yaml
- Ingress Host and Cluster TLS Issuer. You can refer to how to obtain a free TLS Certificate using Let's Encrypt from this article: https://8grams.tech/blog/how-to-get-free-ssl-certificate-for-kubernetes-cluster-using-lets-encrypt/
- Config's values
On values-runner.yaml
- Config's values
Install both of them using Helm
~$ helm install drone-server charts/general -n drone -f values-server.yaml --create-namespace
~$ helm install drone-runner charts/general -n drone -f values-runner.yaml
Check the installation
~$ kubectl get deployment -n drone
NAME READY UP-TO-DATE AVAILABLE AGE
drone-server-general 1/1 1 1 3m
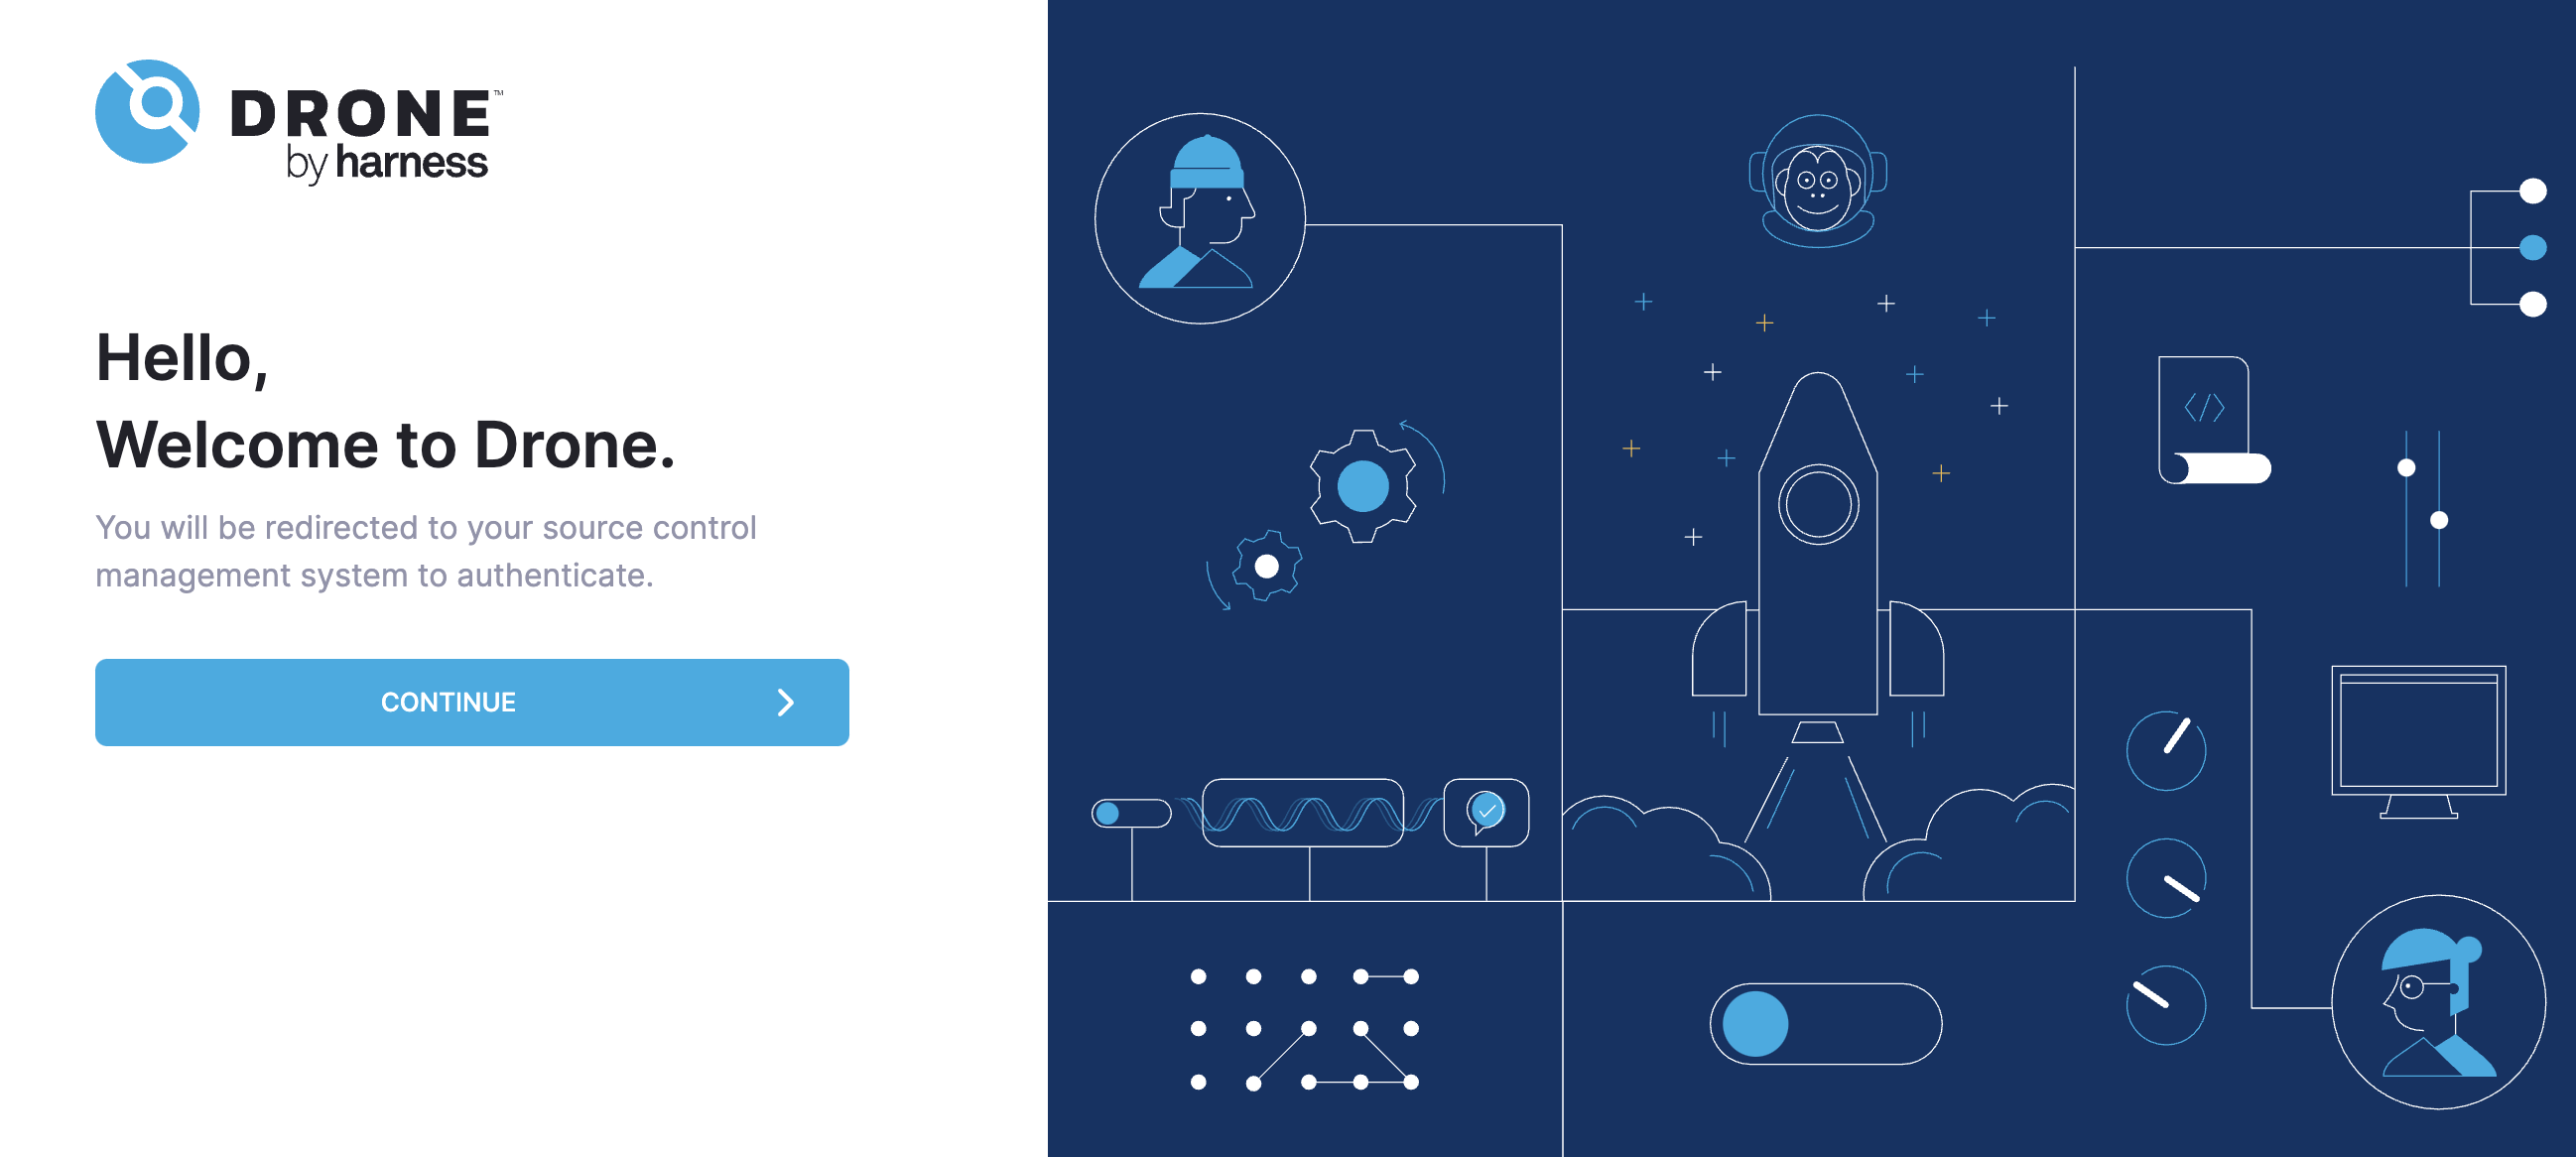
drone-runner-general 1/1 1 1 1mGo to https://drone.example.com (you may already adjusted) and you should see Drone CI Login Interface:
Looks good! Congratulations, you have installed the Open Source Cloud Native CI/CD Platform on your Kubernetes Cluster. In the upcoming article, we will explore how to use Drone CI to build a Docker image from repositories on GitHub.
Frequently Asked Questions
What is Drone CI?
Drone CI is an open-source, container-native continuous integration and delivery platform. It runs each build step inside a container, which makes it naturally scalable and well suited to containerized environments like Kubernetes. Drone offers a rich plugin system and a simple setup aimed at small to medium-sized projects.
How does Drone CI compare to Jenkins?
Drone CI offers a simpler, container-native setup, while Jenkins is highly flexible with a steeper learning curve and a vast plugin ecosystem. Drone scales naturally through its container architecture and suits small to medium projects, whereas Jenkins is versatile across many infrastructures and better fits large, complex projects with extensive customization needs.
Is Drone CI suitable for Kubernetes?
Yes, Drone CI is well suited to Kubernetes because its container-native architecture aligns with how Kubernetes schedules and runs workloads. Each pipeline step runs in a container, allowing builds to scale across the cluster. This makes Drone a strong fit for teams running cloud-native CI/CD directly on Kubernetes.
Drone CI vs Tekton: which should you choose?
Choose Drone CI for a simpler, container-native pipeline that works across environments, and Tekton when you want a Kubernetes-native framework built from custom tasks. Tekton requires Kubernetes expertise and is designed for teams heavily invested in cloud-native practices, while Drone offers an easier setup with a rich plugin system for small to medium projects.
What is Drone CI used for?
Drone CI is used to automate building, testing, and deploying software through container-based pipelines. Developers define pipelines that run each step in a container, integrate with plugins for tasks like notifications or deployments, and scale builds across infrastructure. It is commonly used for continuous integration and delivery in containerized and Kubernetes environments.
Collectors often read football history through collars, sponsors, badges, and colour patterns because shirts can show how clubs balance heritage and modern style. For Chelsea, shirt design can bring together stadium culture, famous players, and the look of a particular era. When personalised names and numbers matter, Juventus football shirts is a clear search phrase for readers comparing styles and versions. In conversations about club identity, the shirt works as a cultural object as well as something to wear.